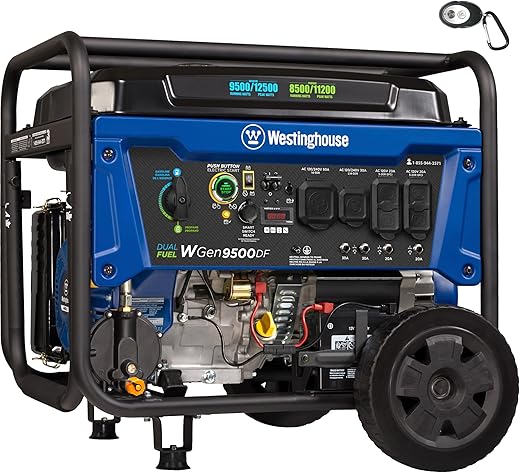
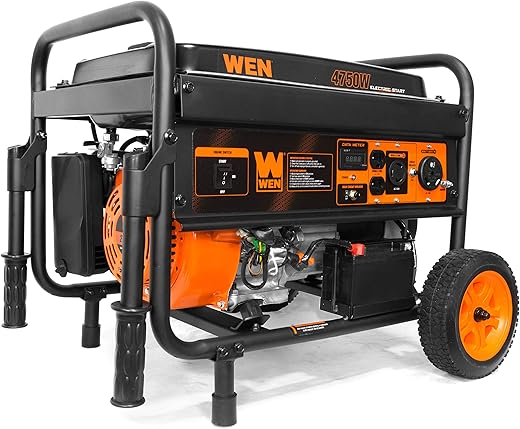
In times of unforeseen power outages, having a reliable emergency generator can bring peace of mind to you and your loved ones. This step-by-step guide walks you through the essential process of testing your generator to ensure it functions properly when you need it the most. By following these simple yet crucial steps, you’ll gain confidence in your generator’s performance, ensuring that it’s ready to safely power your home during an emergency. Remember, taking the time to test your generator now can make all the difference when you’re faced with unexpected blackouts.
Testing Emergency Generator: Off-Load and On-Load Procedures | SOLAS Regulations for Emergency Power Supply
Check Fuel Levels
Check the fuel gauge located on the generator’s control panel. If the gauge indicates that the fuel level is low or empty, proceed to refill the generator with the appropriate type of fuel as specified in the user manual. For instance, if the manual recommends using unleaded gasoline, ensure you do not mix it with diesel fuel, as this can lead to engine damage. Always verify that you are using fresh fuel, as stale or contaminated fuel can cause the generator to malfunction.
Refill the fuel tank by carefully removing the fuel cap. Pour the fuel slowly to avoid spills, and make sure to use a funnel if necessary. If your generator supports a specific fuel mix, such as a two-stroke engine requiring a mixture of oil and gasoline, follow the mixing ratios outlined in the user manual closely. After refilling, securely fasten the fuel cap back in place and clean up any spilled fuel to prevent hazards. Always check for leaks around the fuel lines and connections before starting the generator to ensure safe operation.
Inspect the Generator
Perform a thorough visual inspection of the generator by walking around it and closely examining every visible part. Look for any signs of physical damage such as dents, cracks, or bending in the frame. Inspect all hoses and connections for leaks, which may indicate wear or failure. Take note of any oil or fluid stains beneath the generator, as these could signal leaks that require immediate attention. Corrosion can significantly affect performance and safety, so check metal components for rust or discoloration, especially in high-moisture areas.
Check that all components of the generator are securely fastened and in good condition. Examine bolts, screws, and brackets for tightness, and retighten any loose fasteners you may discover. Inspect electrical connections for signs of fraying or damage, and ensure plugs and cables are intact and properly secured. Assess the condition of filters and belts, replacing them if necessary, to maintain optimal functionality. A well-maintained generator not only performs better but also extends its lifespan, so take the time to ensure every aspect is in order.
Connect to a Load
Connect the generator to a load by using appropriate extension cords and power strips. Ensure that the generator is turned off before plugging in any appliances or lights. Choose devices that collectively do not exceed the generator’s maximum wattage capacity, which is typically indicated on its data plate. For instance, you might connect a 500-watt work light and a 1000-watt electric kettle, making sure that the total does not surpass the generator’s output. Once everything is set, start the generator and slowly add the loads to observe how it responds.
Monitor the generator’s performance while keeping the load connected. Check for any unusual noises, fluctuations in power, or warning lights on the generator’s display panel. It is important to note whether the generator handles the load without stalling or tripping circuit breakers. For example, if the generator powers both the work light and kettle efficiently, it indicates that it is functioning properly under real-world conditions. If issues arise, consider reducing the load or consulting the owner’s manual for troubleshooting guidance.
Start the Generator
- Read the manufacturer’s manual thoroughly before starting the generator. Familiarize yourself with the specific starting procedures and safety precautions outlined in the documentation.
- Check the fuel level and ensure that you’re using the correct type of fuel as specified by the manufacturer.
- Inspect the oil level and top it off if necessary, as adequate lubrication is crucial for the generator’s engine.
- Position yourself safely at the generator and ensure that no flammable materials are nearby.
- Engage the choke if required based on the specific model and toggle the fuel valve to the open position.
- Turn the ignition switch or press the start button to initiate the starting process.
- Observe the generator as it starts and listen carefully for any unusual noises such as grinding, knocking, or sputtering.
- Monitor the generator’s gauges to ensure they’re within normal operating ranges and watch for warning lights or indicators that may signal issues.
- Should you hear any odd sounds or see any warning alerts, immediately turn off the generator and consult the manual for troubleshooting procedures.
- Allow the generator to run for a few minutes and ensure it operates smoothly before connecting any devices to avoid damaging them.
- Confirm that all electrical connections are secure and that there are no frayed cables or broken components.
Monitor Performance
Monitor the generator’s performance continuously while it is in operation. Observe the voltage output displayed on the control panel; ensure that it remains within the specified range for your application. Check the frequency readings as well, verifying that they align with the standard operating conditions. Pay close attention to any fluctuations or irregularities. If you notice any anomalies, such as a sudden drop in voltage or frequency changes, take immediate action to investigate the cause.
Listen for any unusual noises emanating from the generator. Inspect for signs of overheating or vibrations, which could indicate a malfunction. Regularly check the fuel levels and ensure that there are no leaks. Maintain a constant eye on the temperature gauge to confirm it remains within acceptable limits. If any issues occur, address them promptly to prevent further complications. Document any performance irregularities for future reference and follow up with necessary repairs or maintenance as needed.
Final Checklist for Testing
In conclusion, testing an emergency generator is an essential practice that cannot be overlooked. By conducting regular checks and following the outlined steps, I can ensure that my generator is in optimal working condition, ready to provide power when I need it most. Taking the time to test and maintain my generator not only enhances its reliability but also gives me peace of mind during unexpected power outages.
Essential Equipment List
Essential Pre-Use Checks
Essential Steps for Safe and Efficient Operation
- Read the Manual: Before operating the emergency generator, I always familiarize myself with the manufacturer’s manual. This provides important safety information, operational guidelines, and maintenance tips
- Choose a Safe Location: I make sure to position the generator outdoors in a well-ventilated area, away from windows and doors. This helps prevent carbon monoxide buildup, which can be dangerous
- Check Fuel Levels: Before starting the generator, I ensure it has an adequate supply of fuel—usually gasoline or propane. It’s important to store fuel in approved containers and to never overfill the tank
- Use Proper Extension Cords: I utilize heavy-duty extension cords rated for the power needs of my appliances. This ensures that I can safely connect devices to the generator without overloading it
- Perform Regular Maintenance: After use, I take the time to check and maintain my generator by cleaning the air filter, checking the oil level, and inspecting the fuel system to ensure it remains in good working condition for future use
Everything You Need to Know About Emergency Generators
To maintain an emergency generator and ensure its reliability, I follow several key practices:
- Regular Inspections: I conduct thorough inspections of the generator at least once a month, checking for any visible signs of wear, leaks, or corrosion.
- Routine Maintenance: I adhere to the manufacturer’s maintenance schedule, which typically includes changing the oil and oil filter, inspecting and replacing air and fuel filters, and examining spark plugs (in gas-powered generators) at regular intervals.
- Battery Maintenance: I ensure the battery is in good condition by checking its fluid levels, cleaning terminals, and testing it for charge and performance. Replacing the battery when necessary is crucial for reliable starts.
- Fuel Quality: I use high-quality fuel and regularly check the fuel system for contamination. If the generator is not used frequently, I add a fuel stabilizer to prevent degradation.
- Exercise the Generator: I run the generator under load for about 30 minutes every month. This helps to keep the engine lubricated and tests the system’s functionality.
- Check the Exhaust System: I inspect the exhaust system for blockages or leaks to ensure safe operation and efficient performance.
- Storage Conditions: I keep the generator in a dry and clean environment, away from excessive moisture and potential hazards.
- Documentation: I maintain a log of all maintenance and repairs performed, which helps track the generator’s performance and any potential issues over time.
By following these practices, I can significantly enhance the reliability and longevity of the emergency generator.


Great tips! Never thought about checking the oil level before starting it up. Thanks!
Awesome article! More people need to take this stuff seriously.
I always forget to run a load test. This article is a good reminder!
Wish I had read this before our last blackout! Lesson learned.
The part about keeping it clean is so true. A dirty generator won’t work when you need it most!
Does anyone know how often you should really test these things? Asking for a friend!